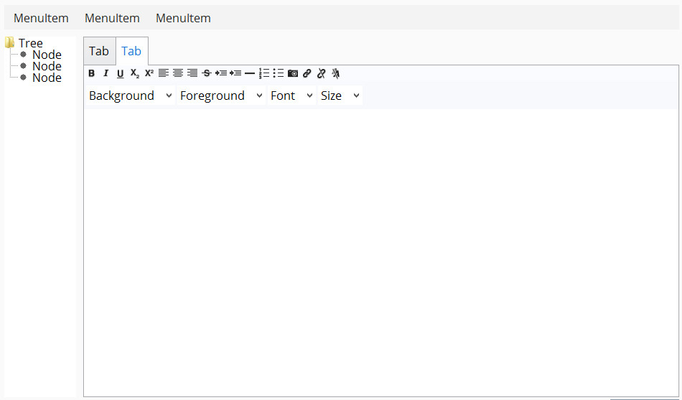
Das XdevBorderLayout eignet sich vor allem als Grund-Layout für eine klassische grafische Oberfläche. I.d.R. gibt es einen zentralen Anwendungsbereich und ein oder mehrere davon getrennte Bereiche für die Steuerung der Anwendung, die fest an den Rand angedockt werden, z.B. Menü, Tree-Navigation, Statusleiste. In ein XdevBorderLayout lassen sich daher nur maximal 5 UI-Komponenten einfügen. 4 UI-Komponenten können an den Rändern des Parent-Containers angedockt werden - oben, unten, links und rechts. 1 UI-Komponente lässt sich zentrieren und nimmt automatisch den gesamten verbleibenden Platz ein.
- Legen Sie eine neue View ohne Layout an.
- Fügen Sie aus der Palette ein XdevBorderLayout mit Drag-and-Drop in die View ein.
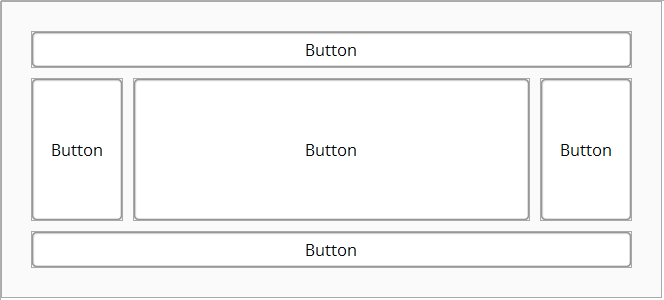
- Fügen Sie einen Button in das XdevBorderLayout ein und docken Sie diesen mit der Maus an den rechten Rand an.
- Fügen Sie einen Button in das XdevBorderLayout ein und docken Sie diesen an den linken Rand an.
- Fügen Sie einen Button in das XdevBorderLayout ein und docken Sie diesen an den oberen Rand an.
- Fügen Sie einen Button in das XdevBorderLayout ein und docken Sie diesen an den unteren Rand an.
- Fügen Sie einen Button in die Mitte des XdevBorderLayout ein.
Varianten
Da in einem XdevBorderLayout nicht zwingend 5 UI-Komponenten vorhanden sein müssen, gibt es zahlreiche KombinationsmöglichkeitenThe XdevBorderLayout is particularly useful as a basic layout for traditional graphical interfaces. Usually, there is a central application together with one or more separate areas for controlling the application, which can be firmly docked to the edge; e.g., menu, tree navigation, status bar. Therefore, you can enter no more than five UI components in an XdevBorderLayout. Four UI components can be docked to the borders of the parent container—top, bottom, left, and right. A UI component can be placed in the center of the container and automatically occupies all of the remaining space.
- Create a new view without layout.
- Drag a XdevBorderLayout from the Palette and drop in the View.
- Add a button to the XdevBorderLayout and dock it to the right border using you mouse.
- Add a button to the XdevBorderLayout and dock it to the left border using you mouse.
- Add a button to the XdevBorderLayout and dock it to the upper border using you mouse.
- Add a button to the XdevBorderLayout and dock it to the lower border using you mouse.
- Add a button at the center of the XdevBorderLayout .
Combinations
Since an XdevBorderLayout does not necessarily require five UI components, there are numerous possible combinations:


Layout
...
options
- Align
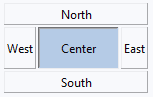
- North
- -
Dockt die UI-Komponente an den oberen Rand des Parent-Containers an- Docks the UI component to the top of the parent container.
- South -
Dockt die UI-Komponente an den unteren Rand des Parent-Containers an- Docks the UI component to the bottom of the parent container.
- West -
Dockt die UI-Komponente an den linken Rand des Parent-Containers an.East - Dockt dieUI-Komponente an den rechten Rand des Parent-Containers an- Docks the UI component to the left of the parent container.
- East - Docks the UI component to the right of the parent container.
- Center -
Die UI-Komponente nimmt den gesamten restlichen Platz ein- The UI component occupies all of the remaining space.
- Width
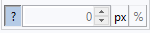
- ? - Die Breite der UI-Komponente wird automatisch durch ihren Content definiert. px - Die Breite der UI-Komponente wird fest in Pixel definiert. The width of the UI component is automatically defined by its content.
- px - The width of the UI component is defined in pixels
- % - Die UI-Komponente streckt sich über die gesamte verfügbare Zellen-Breite. The UI component stretches over the entire available cell width
- Height

- ? - Die Höhe der UI-Komponente wird automatisch durch ihren Content definiert The height of the UI component is automatically defined by its content.
- px - Die Höhe der UI-Komponente wird fest in Pixel definiert. The height of the UI component is defined in pixels.
- % - Die UI-Komponente streckt sich über die gesamte verfügbare Zellen-Höhe.
...
- The UI component stretches over the entire available cell height.