Account anlegen
Um RapidClipse downloaden zu können, müssen Sie einen kostenlosen XDEV Account anlegen.
...
Create an account
To download RapidClipse, you will first need to create a free XDEV account.
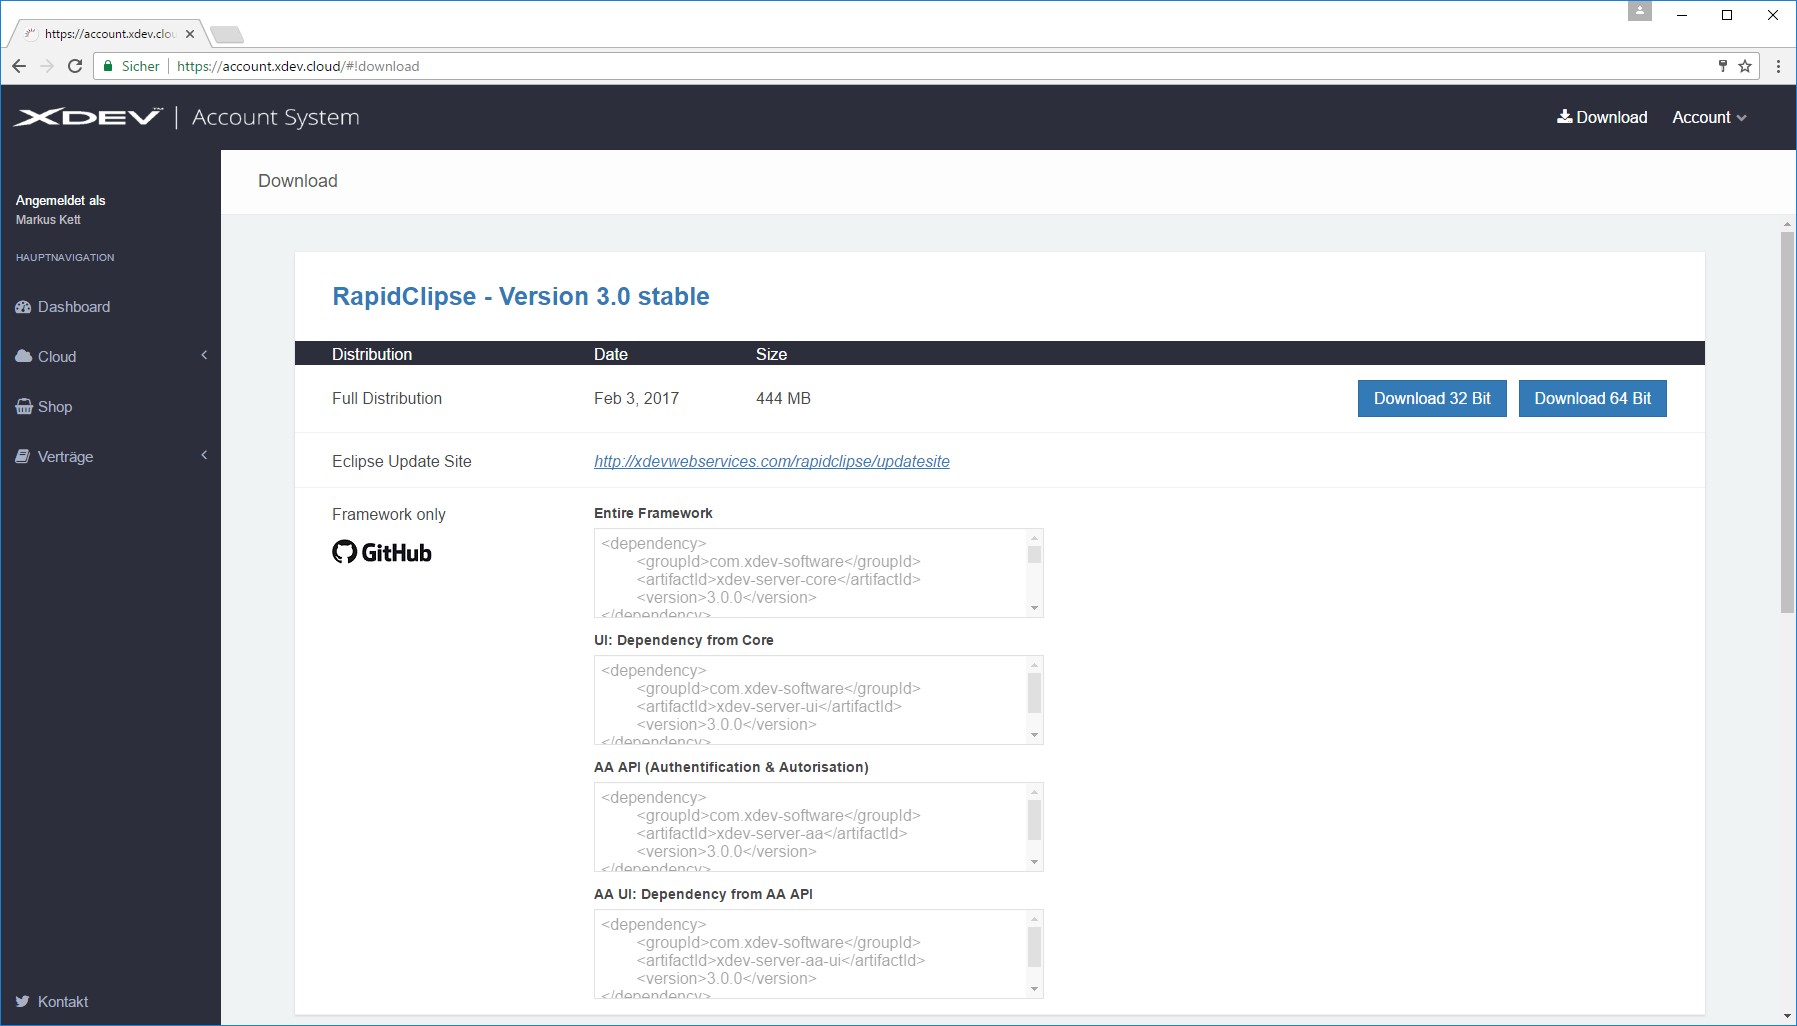
- You can access the XDEV Account System on https://account.xdev.cloud.

- Klicken Sie auf Jetzt registrieren.
- Füllen Sie das Registrierungsformular aus und klicken Sie auf

- Click on Sign up now.
- Fill out the registration form and click Sign Up.
- Suchen Sie in Ihrem E-Mail Eingang nach einer E-Mail mit dem Absender XDEV Account System und klicken Sie in der E-Mail den Aktivierungslink.
RapidClipse Download
...
Klicken Sie in der oberen Menüleiste auf Download.
Downloaden Sie die RapidClipse 32- oder 64-Bit Version für Windows.
...
RapidClipse installieren
- Starten Sie die Installationsdatei, z.B.Check your inbox for an email from XDEV Account System and click the activation link.
Download RapidClipse
- Sign in to the XDEV Account System using the email address and password you used to create your account.
Go to the menu bar at the top of the page and click Download.
Download the 32- or 64-bit version of RapidClipse for Windows.
Install RapidClipse
Execute the setup file; e.g., RapidClipse-3_0_0-win64.
- Falls eine ältere RapidClipse Version als If the RapidClipse installation detects an older version of the software than 2.0.0 erkannt wird, wählen Sie select No, install into a different directory, um mögliche Konflikte mit früheren Betaversionen auszuschließen, und klicken Sie to avoid potential conflicts with previous beta versions. Then click Next >.
- Lesen Sie die Lizenzbestimmungen aufmerksam durch. Wenn Sie mit den Bestimmungen einverstanden sind, klicken Sie Be sure to read the licensing terms carefully. If you agree to the terms, click I accept the agreement und klicken Sie and Next >. Wenn Sie mit den Lizenzbestimmungen nicht einverstanden sind, dürfen Sie RapidClipse nicht installieren.
- Wählen Sie einen Ordner auf Ihrem System, in dem RapidClipse installiert werden soll und klicken Sie Next >.
- Wählen Sie einen Startmenü Ordner, in dem ein RapidClipse Shortcut angelegt werden soll und klicken Sie Next >.
- Wählen Sie Create a desktop icon sowie Create a Quick Launch icon und klicken Sie Next >.
- Klicken Sie Finish, um die Installation abzuschließen und um RapidClipse zu starten.
Hinweis:
...
- If you don’t agree to the terms, you will not be able to install RapidClipse.
- Select the folder in your system in which you want to install RapidClipse and click Next >.
- Select a folder in the start menu where you want to create a shortcut for RapidClipse and click Next >.
- Select Create a desktop icon and Create a Quick Launch icon and click Next >.
- Click Finish to complete the setup and launch RapidClipse.
Note:
- Java Runtime Environment – To set up and run RapidClipse, Java Runtime Environment (JRE) ab Java Version 8 Update 121 auf Ihrem System installiert sein. Wenn sich bereits ein or later is required. If you already have a 32-bit JRE auf Ihrem System befindet, können Sie RapidClipse nur als on your system, you can only use the 32-bit Version verwendenversion of RapidClipse.
- Java Development Kit - Es ist empfehlenswert, gleich ein vollständiges – We recommend installing the complete Java Development Kit (JDK) ab Java Version 8 zu installierenor later. Das JDK enthält neben der JRE auch die Sourcecode Dokumentation /wiki/spaces/DOC/pages/31851092, die Sie bei der Programmierung in Java und spätestens für das /wiki/spaces/DOC/pages/31851111 Ihrer fertigen Anwendung brauchen.Setup findet keine Java Runtime - Falls die Fehlermeldung The JDK includes the JRE and the source code documentation Javadoc, which you will need when programming in Java and for the deployment of the completed application.
- Setup could not find a Java Runtime on your system - If you get the error Setup could not find a Java Rintime Runtime on your system erscheint, konnte keine no Java 8 Runtime Environment auf Ihrem System gefunden werden. Gehen Sie wie folgt vor:Wählen Sie C: > could be detected on your system. Proceed as follows:
- Select C: > Programme (x86) > > Java > jre1 > jre1.8.0_121 > > bin aus.
- Selektieren Sie java (AnwendungSelect Java (application).
Falls Sie keinen Java Ordner oder nur eine frühere Java Version auf Ihrem System finden können, müssen Sie zuerst Java 8 downloaden, installieren und die Schritte 1 bis 2 erneut ausführen, um die RapidClipse Installation fortsetzen zu können.
Betriebssystem
Java 8 downloaden und installieren
Lauffähige Kombinationen:If you can’t find any Java folder on your system or are only able to locate an older Java version, download and set up Java 8 and then repeat steps 1 and 2 to continue setting up RapidClipse.
Download and set up Java 8
Supported combinations:
BitOperating System
Java
RapidClipse
32-
Bitbit 32-
Bitbit 32-
Bitbit 64-
Bitbit 32-
Bitbit 32-
Bitbit 64-
Bitbit 64-
Bitbit 32-
Bitbit 64-
Bitbit 64-
Bitbit 64- Panel borderColor #f5f5f5 bgColor #fcfcfc borderStyle solid Achtung: Wenn Sie ein 32-Bit Betriebssystem benutzen, können Sie nur Java 32-Bit (x86) und damit nur RapidClipse 32-Bit installieren.
RapidClipse starten
Internet-Verbindung
- Erstmaliger Start von RapidClipse - Eine Internet-Verbindung ist zwingend erforderlich, da RapidClipse alle benötigten Libraries via Maven downloaden muss. Bei langsamer Internet-Verbindung kann dies entsprechend lange dauern.
- Offline-Modus - An einem bereits vorhandenen RapidClipse Projekt können Sie auch offline arbeiten. Aktivieren Sie dazu
bit Attention: If you are using a 32-bit operating system, you can only install Java 32-bit (x86) and, as a consequence, only RapidClipse 32-bit.
Launch RapidClipse
Internet connection
- First time starting RapidClipse – Since RapidClipse downloads all the required libraries from Maven on its first use, you will need to be connected to the Internet. If your connection is slow, this process can take some time.
- Offline mode – Once you have downloaded all the required libraries, you can work on your existing RapidClipse projects offline. Simply activate Window > Preferences > Maven > Offline.
Proxy
Proxies können Sie einrichten unter You can set up a proxy by clicking on Window > Preferences > General > Network Connections.