Beim Anlegen eines XDEV Cloud Projekts wird das neue, lokale Projekt in die XDEV Cloud übertragen.
- Wählen Sie im MenüIn the menu, select File > New > RapidClipse Project.
- Geben Sie im folgenden Projekt-Assistenten bei Project name den Namen Ihres Projektes ein, z.BIn the following project wizard, enter the name of your project in Project name , e.g. Example.
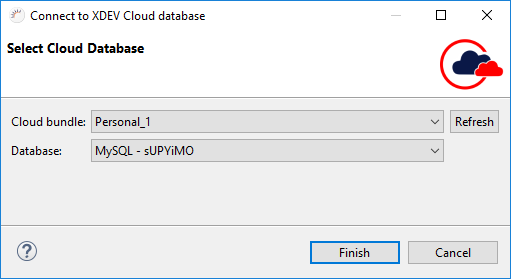
- Wählen Sie bei In Data Source > Connection eine Cloud Datenquelle aus oder klicken Sie auf Connection , select a cloud data source or click New... > XDEV Cloud Database um eine neue Cloud Datenquelle anzulegen.Wählen Sie im folgenden Dialog bei Cloud bundle Ihr Cloud Paket sowie bei Database Ihre Cloud Datenbank aus und klicken Sie auf to create a new cloud database.
- In the following dialog, select your Cloud package under Cloud bundle and your cloud database under Database and click Finish.
- Selektieren Sie beiSelect XDEV Cloud > > Create project in the XDEV Cloud.
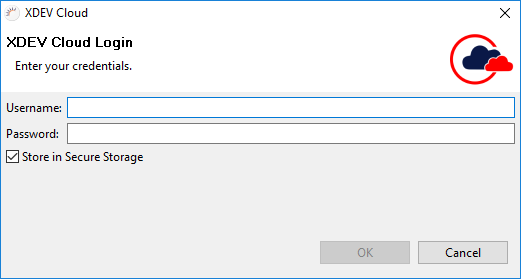
- Beim ersten Zugriff auf die XDEV Cloud geben Sie im folgenden Dialog Ihre XDEV Cloud Zugangsdaten ein und klicken Sie auf When first accessing the XDEV Cloud, enter your username and password in the following dialog and click OK.
Wenn Sie Ihre Zugangsdaten im If you have your data saved in the Eclipse Secure Storage gespeichert haben, müssen Sie nur noch bei Cloud bundle Ihr Cloud Paket auswählen. - Klicken Sie auf Finish.
Ergebnis:
...
- Backup, just select your cloud package under Cloud bundle .
- Click on Finish
Result:
- GIT Repository Secure Storage - Sie können Ihre Zugangsdaten sicher im Secure Storage von Ecilpse hinterlegen. Wenn Sie Secure Storage verwenden, wird ein Master-Password generiert, mit dem Sie auf Ihren Secure Storage zugreifen können. Zu diesem Master-Password können Sie Sicherheitsfragen und die Antworten dazu anlegen
- Local: A new Git repository is created on your local computer.
- In der XDEV Cloud- Es wird ein neues GIT Repository in der XDEV Cloud angelegt.
- Commit - Es wird automatisch der erste Commit durchgeführt und dadurch die Änderungen in Ihrem lokalen GIT Repository in Ihr XDEV Cloud GIT Repository übertragen.
- Database - Stellt eine Verbindung zu Ihrer Cloud Datenbank her.
- Fertiges XDEV Cloud Projekt - Wenn das Anlegen des Cloud Projekts erfolgreich war, erscheint im Project Management beim Projektnamen ein kleines XDEV Cloud Symbol.

Hinweis:
- : A new Git repository is created in XDEV Cloud.
- Commit: The first commit is performed automatically, and changes to your local Git repository will be applied in your XDEV Cloud Git repository.
- Database: Establishes a connection to your cloud database.
- XDEV Cloud project: If the cloud project was successfully created, a small XDEV Cloud icon appears in the Project Management area next to the project name.
Note:
- Secure Storage: You can store your data safely in Eclipse Secure Storage. If you use Secure Storage, a master password is generated that allows you to access your Secure Storage. To add a further level of security, you can create security questions for your master password and assign the respective answers.